
Gluten Free Twix Bars Recipe
Introduction
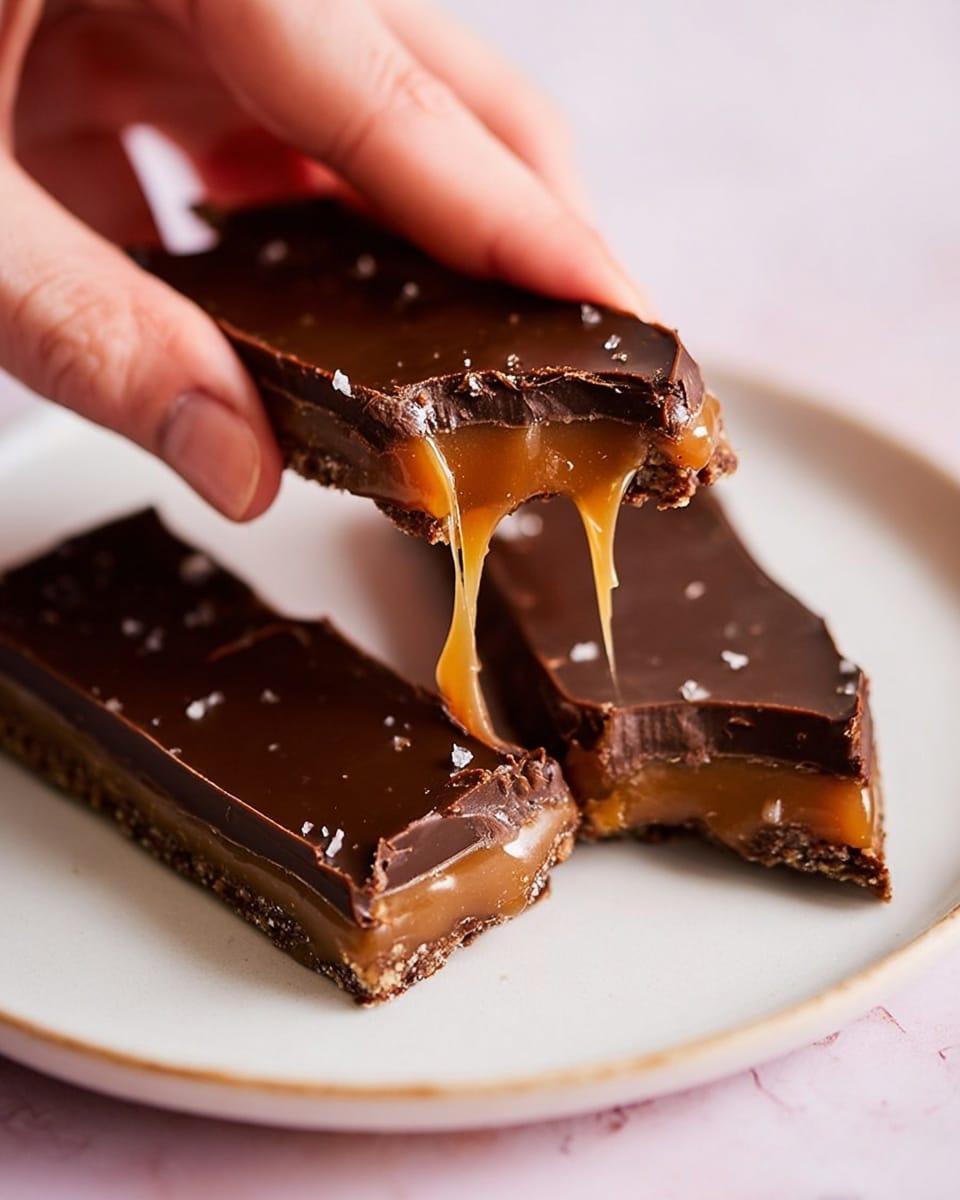
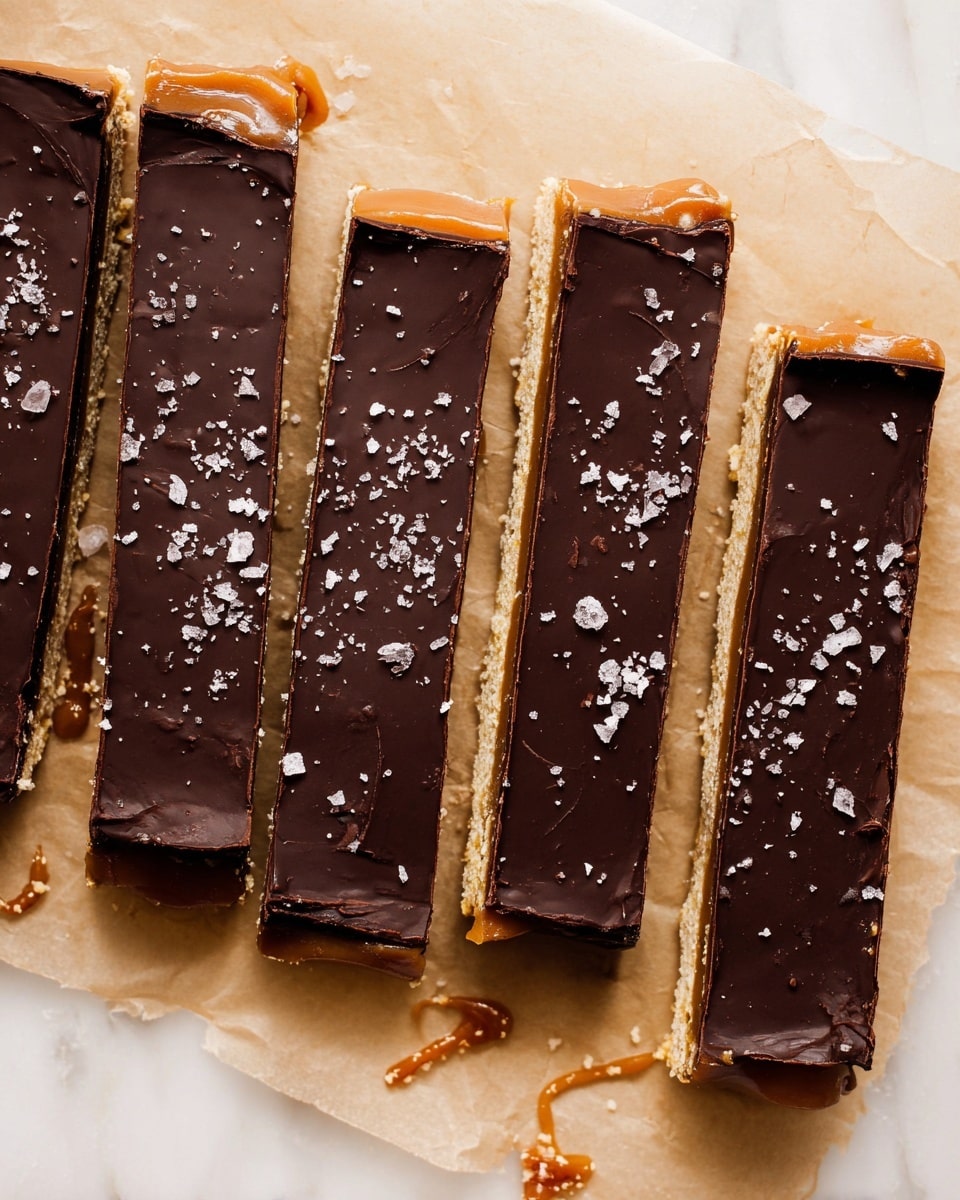
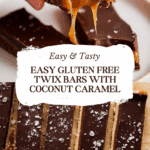
These Gluten Free Twix Bars offer a delicious homemade alternative to the classic treat, perfect for those avoiding gluten and dairy. Made with a coconut flour shortbread base, creamy caramel, and a rich chocolate coating, they’re sure to satisfy your sweet tooth.
Ingredients
- 3/4 cup coconut flour
- 1/4 cup arrowroot starch
- 1/2 cup coconut oil (softened)
- 1/4 cup maple syrup
- 1/2 tsp vanilla extract
- 1 13.5 oz can full-fat coconut milk
- 1/2 cup coconut sugar
- Pinch of salt
- 3/4 cup dairy-free chocolate chips
- 2 tbsp coconut oil
- Flakey salt, for topping
Instructions
- Step 1: Preheat the oven to 325°F and line an 8×8-inch baking pan with parchment paper.
- Step 2: For the crust, mix the coconut flour and arrowroot starch together, then stir in the softened coconut oil, maple syrup, and vanilla extract until well combined.
- Step 3: Evenly flatten the crust mixture in the bottom of the prepared pan. Use a fork to puncture the crust about 10-15 times to prevent bubbling during baking.
- Step 4: Bake the crust for 25-30 minutes, or until it turns lightly golden brown. Remove from oven and allow it to cool completely.
- Step 5: For the caramel, combine the coconut milk and coconut sugar in a medium saucepan. Whisk well and set over medium-low heat.
- Step 6: Stir often and let the mixture come to a medium simmer. Continue cooking for 25-30 minutes until the caramel thickens.
- Step 7: Pour the caramel evenly over the cooled shortbread crust. Spread gently and place the pan in the fridge for 2-3 hours or overnight to set.
- Step 8: For the chocolate coating, melt the dairy-free chocolate chips and 2 tablespoons of coconut oil together, using a double boiler or a gentle heating method of your choice.
- Step 9: Pour the melted chocolate over the set caramel layer and spread into an even layer. Let the pan cool slightly before refrigerating again to harden the chocolate completely.
- Step 10: Once fully set, transfer the Twix bars to a cutting board. Sprinkle flakey salt on top, then use a sharp knife to cut into 12 bars or your preferred size.
- Step 11: Serve immediately or store in the fridge with parchment paper between bars to prevent sticking.
Tips & Variations
- Use full-fat canned coconut milk for a rich, creamy caramel. Light coconut milk may not thicken properly.
- If you prefer a less sweet caramel, reduce the coconut sugar slightly.
- For an extra crunch, sprinkle chopped nuts over the caramel before adding the chocolate layer.
- To melt chocolate, a double boiler method helps prevent scorching and keeps it smooth.
Storage
Store the bars in an airtight container in the refrigerator for up to one week. Keep parchment paper between layers to avoid sticking. To serve, let bars sit at room temperature for a few minutes or warm gently to soften the chocolate if desired.
How to Serve
Serve this delicious recipe with your favorite sides.
FAQs
Can I use a different flour instead of coconut flour?
Coconut flour absorbs a lot of moisture, so substitutions like almond flour will change the texture and may require recipe adjustments. For best results, stick to coconut flour and arrowroot starch as listed.
Is this recipe dairy-free and vegan?
Yes, this recipe uses dairy-free chocolate and coconut ingredients, making it suitable for both dairy-free and vegan diets. Just ensure your chocolate chips are certified dairy-free or vegan.
Print
Gluten Free Twix Bars Recipe
- Total Time: 2 hours 30 minutes
- Yield: 12 servings 1x
- Diet: Gluten Free
Description
These Gluten Free Twix Bars combine a buttery coconut flour shortbread crust with a rich, homemade coconut caramel layer and a smooth dairy-free chocolate topping. Perfectly sweetened with coconut sugar and maple syrup, these bars are a healthier twist on the classic treat, with flakey salt enhancing the flavor contrast. Ideal for gluten-free and dairy-free dessert lovers.
Ingredients
Shortbread Crust
- 3/4 cup coconut flour
- 1/4 cup arrowroot starch
- 1/2 cup coconut oil (softened)
- 1/4 cup maple syrup
- 1/2 tsp vanilla extract
- Pinch of salt
Caramel Layer
- 1 13.5 oz can full-fat coconut milk
- 1/2 cup coconut sugar
Chocolate Coating
- 3/4 cup dairy-free chocolate chips
- 2 tbsp coconut oil
- Flakey salt (for topping)
Instructions
- Preheat Oven and Prepare Pan: Preheat your oven to 325°F (163°C) and line an 8×8 inch baking pan with parchment paper to ensure easy removal of the bars later.
- Make the Shortbread Crust: In a mixing bowl, combine the coconut flour and arrowroot starch. Add softened coconut oil, maple syrup, and vanilla extract, mixing until you have a smooth dough. Press this mixture evenly into the bottom of your prepared pan, then use a fork to puncture holes evenly across the crust, which will help it bake evenly.
- Bake the Crust: Place the crust in the oven and bake for 25-30 minutes or until it turns lightly golden brown. Once baked, remove it from the oven and let it cool completely at room temperature.
- Prepare the Caramel: In a medium saucepan over medium-low heat, whisk together the full-fat coconut milk and coconut sugar. Stir frequently and bring the mixture to a medium simmer. Allow it to cook gently, stirring often, for 25-30 minutes until the mixture thickens into a rich caramel consistency.
- Assemble Caramel Layer: Pour the thickened caramel evenly over the cooled shortbread base. Spread carefully to cover the entire surface. Transfer the pan to the refrigerator for 2-3 hours or overnight to let the caramel set firmly.
- Melt the Chocolate Coating: Using a double boiler or a gentle heat method, melt the dairy-free chocolate chips together with coconut oil until smooth and glossy.
- Apply Chocolate Layer: Pour the melted chocolate over the hardened caramel layer and spread it evenly with a spatula. Allow the pan to cool slightly before placing it back in the fridge to let the chocolate harden completely.
- Cut and Serve: Once set, remove the bars from the pan using the parchment paper edges. Sprinkle flakey salt on top to enhance flavor. Use a sharp knife to cut into 12 bars or your preferred size. Serve immediately or store them in the fridge with parchment paper separating layers to avoid sticking.
Notes
- For best results, allow the caramel layer to chill overnight for a firmer texture.
- You can substitute arrowroot starch with tapioca starch if unavailable.
- Use full-fat coconut milk for a creamy and thick caramel.
- Store bars in an airtight container in the refrigerator to maintain freshness.
- Double boiler method helps prevent burning the chocolate when melting.
- Prep Time: 20 minutes
- Cook Time: 1 hour
- Category: Dessert
- Method: Baking
- Cuisine: Gluten Free
Keywords: Gluten Free Twix Bars, dairy-free dessert, coconut caramel bars, homemade Twix, gluten free baking, vegan chocolate bars
