
Chicken Onigiri Recipe
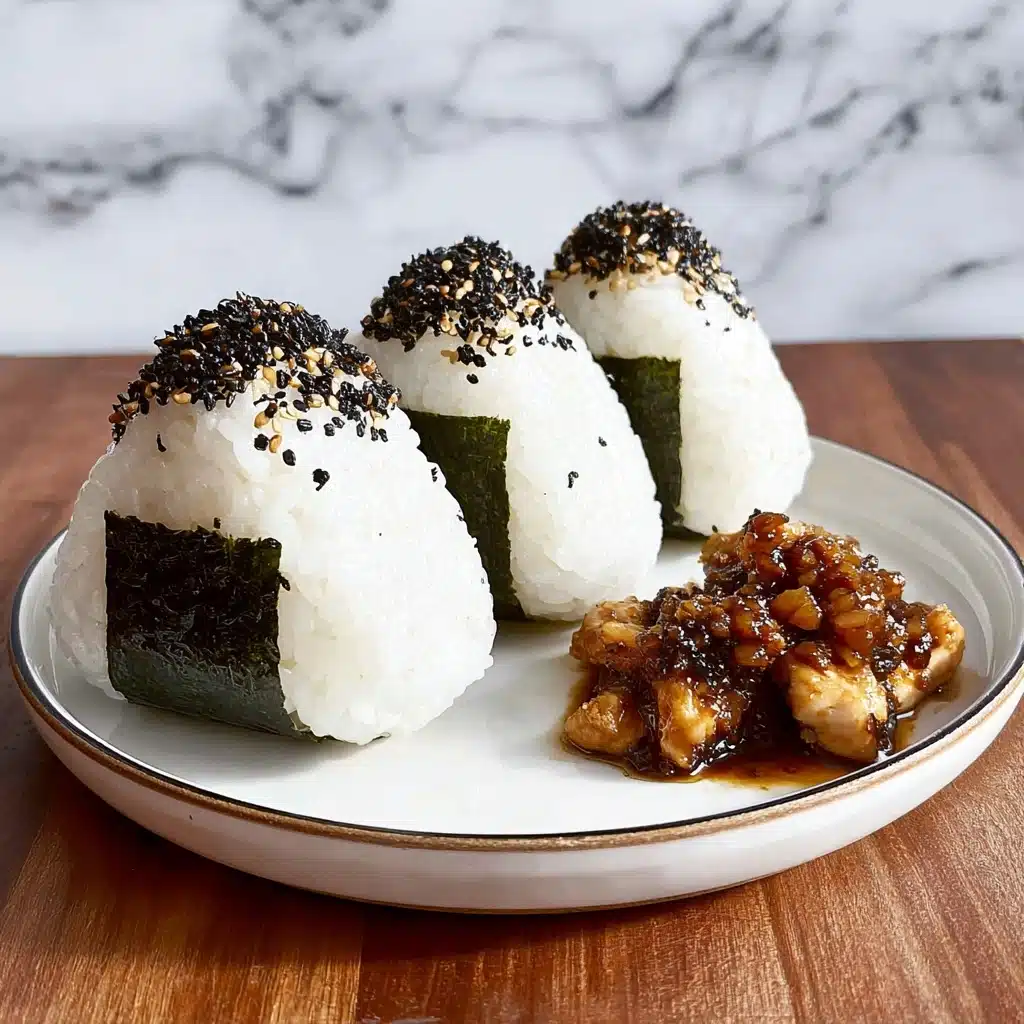
If you’re looking to dive into a delightful Japanese snack that’s both comforting and packed with flavor, then Chicken Onigiri is your new best friend. These charming rice triangles filled with tender, savory chicken make for an irresistible treat that’s perfect for lunch, a quick snack, or even a picnic companion. The beauty of Chicken Onigiri lies in their simplicity and balance—fluffy sushi rice, umami-rich chicken teriyaki filling, and the subtle crunch of nori wrapping it all up. Once you get the hang of making these, they become a go-to recipe that’s as satisfying to eat as it is to prepare.
Ingredients You’ll Need
Gathering the right ingredients for Chicken Onigiri is straightforward, yet each plays a crucial role in delivering that perfect harmony of textures and flavors. From the slight tang of sake in the marinade to the aromatic furikake seasoning, each ingredient is essential to ensure your onigiri feels authentic and utterly delicious.
- 4 cups cooked sushi rice: The foundation of your onigiri, sushi rice is sticky enough to hold shape but tender enough for each bite to melt in your mouth.
- 1/2 teaspoon fine salt: A delicate sprinkle to season the rice evenly and enhance all the other flavors.
- 2 tablespoons furikake (optional): This Japanese rice seasoning adds an extra pop of umami, texture, and a splash of color to your rice.
- 1/2 pound boneless skinless chicken (preferably drumsticks): Drumsticks stay juicy and tender, making them ideal for the filling.
- 2 teaspoons soy sauce: Adds a salty depth to the chicken marinade.
- 1 tablespoon sake (or water): Tenderizes the chicken and adds a subtle complexity.
- 1/4 teaspoon baking soda: Helps keep the chicken tender by softening the proteins.
- 1 teaspoon cornstarch: Used to thicken the sauce glaze perfectly.
- 1 ½ tablespoons soy sauce (for sauce): Balances sweetness and saltiness in the teriyaki glaze.
- 1 tablespoon mirin: Sweet rice wine that provides a natural sweetness and shine to the glaze.
- 1 tablespoon firmly packed brown sugar: Adds a caramelized sweetness to complement savory soy sauce.
- 1 tablespoon oil: For cooking the chicken to a perfect golden finish.
- 1 tablespoon minced garlic: Infuses the filling with a warm, fragrant punch during cooking.
- 1 sheet nori (cut into small rectangles): Wrapping the onigiri with nori brings a contrasting crunch and that unmistakable seaweed flavor.
How to Make Chicken Onigiri
Step 1: Prep the Rice
Once your sushi rice is cooked and still warm, gently mix in the fine salt and furikake if you’re using it. This ensures every grain of rice is lightly seasoned and speckled with savory bits, giving your onigiri a rich flavor base before adding the filling. The key is to be gentle so the rice maintains its sticky texture without getting mushy.
Step 2: Marinate the Chicken
Chop your boneless chicken into small, bite-sized pieces for easy filling distribution. Toss the chicken pieces with soy sauce, sake, baking soda, and cornstarch, then refrigerate the mixture for at least 30 minutes. This marinating step is crucial for infusing the chicken with umami flavors and keeping it tender once cooked.
Step 3: Make the Teriyaki Glaze
In a small bowl, combine soy sauce, mirin, and brown sugar to create a luscious teriyaki glaze. This sauce will be the magic touch that transforms the chicken into a savory, glossy filling that clings perfectly to the rice.
Step 4: Cook the Chicken
Heat oil in a nonstick pan over medium-high heat. Add the marinated chicken and cook for 2 to 3 minutes until the pieces are nearly cooked through and beautifully golden. Then turn down the heat to medium and add minced garlic to the pan. Cook just until fragrant, about 30 seconds, before pouring in the teriyaki glaze mixture. Stir continuously until the sauce thickens to a shiny glaze enveloping each piece of chicken. Remove from heat to allow flavors to meld.
Step 5: Shape the Onigiri
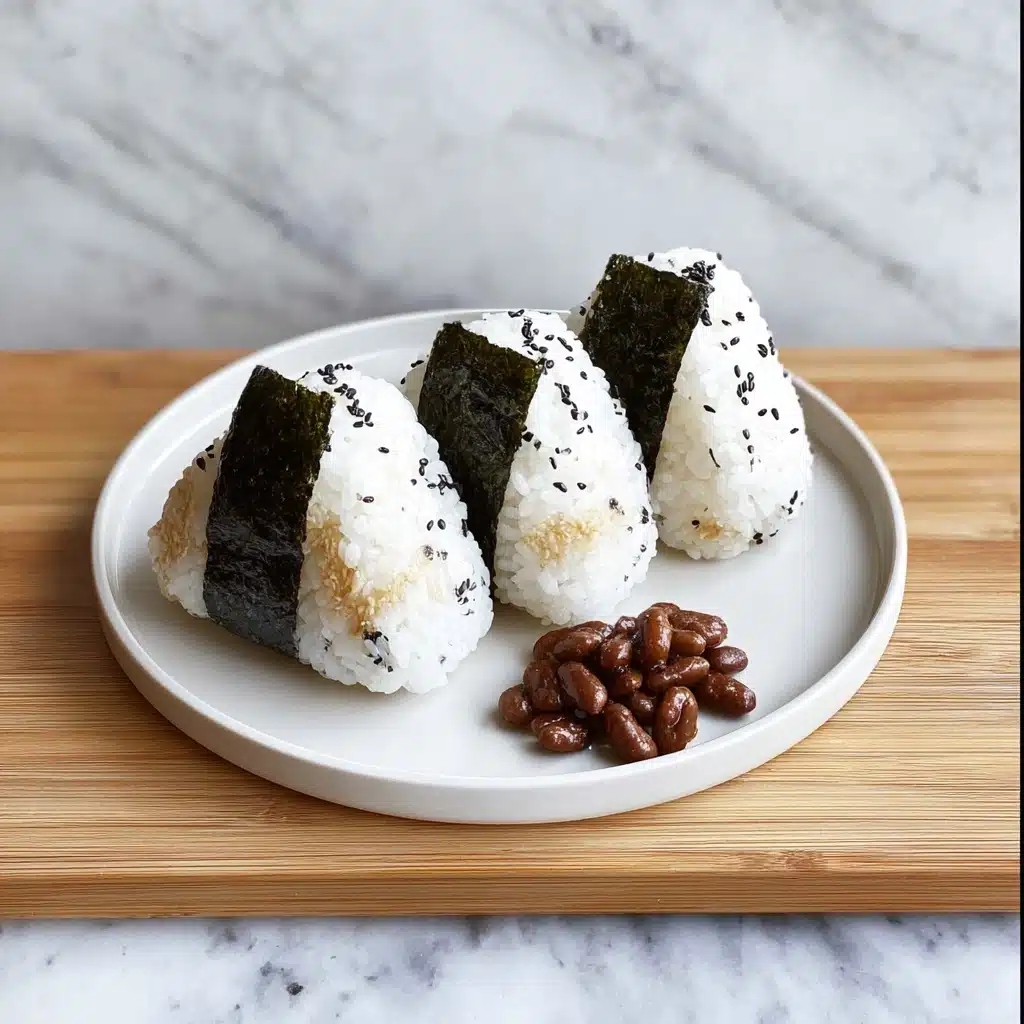
Wet your hands lightly with water to prevent sticking, then scoop approximately 1/3 cup of the seasoned rice into the palm of your hand. Make a small hollow in the center and add a tablespoon of the glazed chicken. Cover this filling with another 1/3 cup of rice, then gently but firmly shape the entire mound into a neat triangle. Wrap each onigiri with a strip of nori to finish. This seaweed not only adds flavor but is perfect for holding your rice ball without mess.
How to Serve Chicken Onigiri
Garnishes
The beauty of Chicken Onigiri is that it stands beautifully on its own, but you can elevate its appeal with simple touches. Sprinkle some extra furikake on top for added crunch and color, or serve with a little dab of Japanese mustard or pickled ginger on the side for a burst of contrasting flavor.
Side Dishes
Chicken Onigiri pairs wonderfully with light, refreshing sides. A small bowl of miso soup, a crisp cucumber salad, or steamed edamame make excellent accompaniments that balance the rich, savory chicken filling with bright, fresh notes.
Creative Ways to Present
For a fun twist, try arranging several Chicken Onigiri on a bamboo leaf or in a bento box for an eye-catching lunch or picnic presentation. You can also shape the rice into different molds—for example, round balls or even fun shapes using onigiri molds—to match any occasion.
Make Ahead and Storage
Storing Leftovers
Chicken Onigiri are great for making ahead, but the rice is best eaten within a day to enjoy peak freshness. Store leftover onigiri in an airtight container in the refrigerator, separating layers with parchment paper to keep them from sticking.
Freezing
If you want to keep Chicken Onigiri longer, freezing is a convenient option. Wrap each onigiri tightly in plastic wrap and place in a freezer-safe bag. When frozen properly, they maintain their texture and flavor for up to a month.
Reheating
When you’re ready to enjoy frozen or refrigerated Chicken Onigiri, microwave them wrapped in a damp paper towel for about 30-40 seconds or until warm. This helps restore moisture and keeps the rice soft. Avoid overcooking, which can dry them out.
FAQs
Can I use other types of chicken for Chicken Onigiri?
Absolutely! While drumstick meat is juicy and flavorful, boneless chicken breast or thigh meat works well too. Just adjust the cooking time to ensure the chicken stays tender and not dry.
Is it necessary to use sushi rice?
Sushi rice is recommended because of its stickiness and texture which helps the onigiri hold their shape. Short-grain rice is best. Using regular long-grain rice may result in crumbly onigiri.
Can I make Chicken Onigiri vegetarian?
If you prefer a meat-free version, try substituting the chicken with sautéed mushrooms or seasoned tofu. Use a similar teriyaki glaze to keep that signature savory-sweet flavor in every bite.
How do I prevent the rice from sticking to my hands?
Keep a bowl of water nearby and wet your hands lightly before shaping each onigiri. Lightly salting your hands also helps prevent sticking and seasons the rice as you form the triangles.
What is the best way to serve Chicken Onigiri for a party?
Serve them bite-sized with a variety of dipping sauces such as spicy mayo, soy sauce, or ponzu. Presentation in mini bamboo baskets or on wooden platters adds a festive, authentic touch.
Final Thoughts
Chicken Onigiri is one of those dishes that feels like a warm hug with every bite—simple, tasty, and totally satisfying. Whether you’re making them for a casual lunch or packing a special bento, this recipe is sure to brighten your table and your day. Give it a try, and you’ll quickly see why Chicken Onigiri has a beloved place in hearts and homes around the world.
Print
Chicken Onigiri Recipe
- Total Time: 50 minutes
- Yield: 6 onigiri 1x
- Diet: Halal
Description
Chicken Onigiri is a delightful Japanese rice ball filled with flavorful marinated chicken glazed in a sweet and savory teriyaki sauce. This recipe features tender chicken pieces cooked with garlic and a rich glaze, encased in perfectly seasoned sushi rice and wrapped with crispy nori seaweed. Perfect for lunchboxes, picnics, or a satisfying snack, these onigiri are easy to make and packed with umami goodness.
Ingredients
Rice
- 4 cups cooked sushi rice
- 1/2 teaspoon fine salt
- 2 tablespoons furikake (optional)
Chicken Marinade
- 1/2 pound boneless skinless chicken meat (preferably drumsticks), cut into small pieces
- 2 teaspoons soy sauce
- 1 tablespoon sake or water
- 1/4 teaspoon baking soda
- 1 teaspoon cornstarch
Teriyaki Sauce
- 1 ½ tablespoons soy sauce
- 1 tablespoon mirin
- 1 tablespoon firmly packed brown sugar
Other Ingredients
- 1 tablespoon oil
- 1 tablespoon minced garlic
- 1 sheet nori, cut into small rectangles for wrapping
Instructions
- Prepare the seasoned rice: After cooking the sushi rice, gently mix it with 1/2 teaspoon of fine salt and 2 tablespoons of furikake for added flavor. It’s best to mix the furikake directly into the rice for even seasoning.
- Marinate the chicken: Cut the chicken into small bite-sized pieces and place them into a bowl. Add 2 teaspoons soy sauce, 1 tablespoon sake or water, 1/4 teaspoon baking soda, and 1 teaspoon cornstarch. Stir well to coat the chicken evenly. Refrigerate for 30 minutes to tenderize and absorb flavors.
- Make the teriyaki sauce: In a small bowl, combine 1 ½ tablespoons soy sauce, 1 tablespoon mirin, and 1 tablespoon firmly packed brown sugar. Stir until the sugar dissolves and the sauce is well mixed.
- Cook the chicken: Heat 1 tablespoon of oil in a large nonstick pan over medium-high heat. Add the marinated chicken pieces and cook for 2-3 minutes until they are fully cooked and slightly browned.
- Add garlic and glaze: Reduce the heat to medium and add 1 tablespoon minced garlic to the pan. Sauté for about 30 seconds until fragrant. Pour in the prepared teriyaki sauce and cook, stirring frequently, until the sauce thickens to a glossy glaze coating the chicken. Remove from heat.
- Shape the onigiri: Wet your hands with water to prevent sticking. Scoop about 1/3 cup of the seasoned rice into your palm and create a small well in the center. Fill the well with 1 tablespoon of the glazed chicken filling. Cover the filling with another 1/3 cup of rice and press gently to form a tight triangle shape.
- Wrap with nori: Wrap each formed rice ball with a strip of nori seaweed. Serve immediately or pack for later consumption.
Notes
- Use fine salt to ensure even seasoning in the rice.
- Furikake is optional but adds great umami and texture to the rice.
- Marinating chicken with baking soda tenderizes the meat for a softer texture.
- Wet your hands with water when shaping onigiri to prevent rice from sticking.
- Onigiri are best eaten fresh for optimal texture but can be stored in the refrigerator and refreshed by warming slightly.
- Nori wraps add crunch and salty flavor but can become soggy if stored for too long.
- Prep Time: 40 minutes
- Cook Time: 10 minutes
- Category: Snack / Lunch
- Method: Pan-frying and assembling
- Cuisine: Japanese
Nutrition
- Serving Size: 1 onigiri (approx. 150g)
- Calories: 250 kcal
- Sugar: 5 g
- Sodium: 600 mg
- Fat: 5 g
- Saturated Fat: 1 g
- Unsaturated Fat: 3 g
- Trans Fat: 0 g
- Carbohydrates: 38 g
- Fiber: 1 g
- Protein: 12 g
- Cholesterol: 40 mg
Keywords: Chicken Onigiri, Japanese rice balls, teriyaki chicken rice balls, sushi rice onigiri, homemade onigiri recipe
